 EN
EN

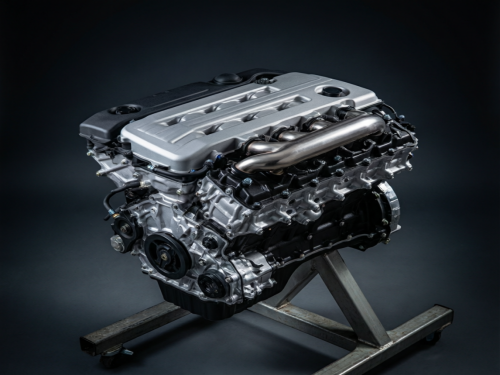
Ventildeckel-Dichtungsbuchsen müssen bei jedem Öffnen des Ventildeckels für Wartungsarbeiten ausgetauscht werden – ohne Ausnahme, bei allen modernen OHC-Motoren. Abgenutzte Buchsen verlieren ihre Kompression, was zu einer Lockerung der Schrauben und zu Ölaustritt führt; ausgefallene Zündkerzenrohrdichtungen lassen Öl um die Zündspulen ansammeln und verursachen Zündaussetzer, die häufig fälschlicherweise als Defekt der Zündspule oder der Zündkerze diagnostiziert werden. Ein zwanzig-Dollar-Dichtungskit verhindert einen zweihundert-Dollar-Zündspulen-Austausch in Zukunft.
Jede Dichtung erfüllt eine spezifische Aufgabe. Schraubdurchführungen isolieren den Schraubenstift vor direktem Kontakt mit der Abdeckungsversteifung und dämpfen Vibrationen, die vom Kopf in den Kunststoff übertragen werden – Ausfallerscheinungen umfassen Klappern im Leerlauf und Ölaustritt rund um den Schraubenkopf. Zündkerzenrohrdichtungen verhindern, dass Öl in die Zündkerzenbohrungen gelangt, sodass die Zündspulenstecker trocken bleiben – Ausfallerscheinungen umfassen Ölansammlung in der Zündkerzenbohrung (sichtbar, sobald die Zündspule entfernt wurde), Zündaussetzer unter Last sowie vorzeitigen Ausfall der Zündspulen infolge ölgeschwollener Stecker. Randdichtungen versiegeln die gesamte Verbindung zwischen Abdeckung und Zylinderkopf – Ausfallerscheinungen umfassen einen externen Ölleck, der an der Außenseite der Abdeckung sichtbar ist oder am Motorblock herabtropft.
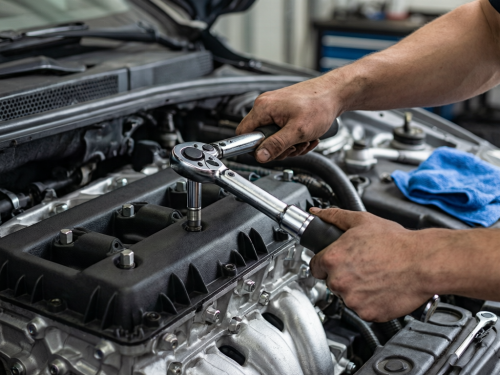
Das korrekte Vorgehen, abgeleitet aus OEM-Serviceunterlagen und unseren eigenen Installationsanleitungen, die an Distributoren in über 80 Ländern versandt werden: Zündspulen trennen und auf einem sauberen Lappen beiseitelegen – nicht stapeln und Zündfolge notieren; PCV-Leitungssystem sowie sämtliche am Deckel befestigte Kabelbäume trennen; Schrauben in umgekehrter Drehmomentreihenfolge entfernen (außen nach innen, spiralförmig), um die Klemmkraft gleichmäßig abzubauen und eine Verformung der Flanschfläche beim Abheben zu vermeiden; Deckel senkrecht nach oben heben, damit die Rohrdichtungen problemlos von den Zündkerzenrohren gleiten, ohne zu reißen; alte Gummimanschetten durch Herausziehen von den Schraubenschaften oder vorsichtiges Heraushebeln mit einem Kunststoff-Pick vom Deckel entfernen; alte Zündkerzenrohrdichtungen heraushebeln – ein kleiner Haken-Pick eignet sich gut, jedoch darf die Dichtungsnut nicht beschädigt werden; neue Rohrdichtungen mit einer dünnen Schicht sauberem Motoröl einfetten, um das Einsetzen zu erleichtern; neue Rohrdichtungen mit gleichmäßigem Druck einpressen, bis sie vollständig in der Nut sitzen; neue Schraubenmanschetten so einbauen, dass die Schulter in die richtige Richtung weist (bei manchen Ausführungen ist die Form asymmetrisch – Teilediagramm prüfen); Deckel mit einer neuen Umfangsdichtung wieder einbauen und die Schrauben in zwei Stufen (50 % und 100 %) in einer spiralförmigen Reihenfolge von der Mitte nach außen gemäß Herstellerangabe anziehen.
Ein repräsentativer Fall: Ein Honda-R18-Besitzer brachte sein Fahrzeug in eine Werkstatt, weil Zylinder 3 unruhig lief und Zündaussetzer auftraten. Diagnosen zu Kraftstoff- und Zündsystem führten zu keinem Ergebnis, und die Zündspule wurde im Rahmen der Garantie ausgetauscht. Drei Monate später trat der Zündaussetzer erneut auf. Bei der Inspektion war die Zündkerzenbohrung Nummer 3 zur Hälfte mit Motoröl gefüllt, und an der zweiten Zündspule war bereits Kohlenstoffablagerung am Gummischutz (Boot) erkennbar. Die Zylinderkopfdeckel-Dichtung war bei einem früheren Dichtungswechsel wiederverwendet worden, wobei die ursprünglichen Zündkerzenrohrdichtungen beibehalten wurden. Neue Rohrdichtungen und eine neue Zündspule beseitigten den Zündaussetzer dauerhaft. Die fünf-Dollar-Dichtung, die übergangen worden war, kostete den Kunden zwei Zündspulen und zwei Arbeitsaufwände innerhalb von sechs Monaten.
Vergleich in Fließtext zwischen den Konstruktionsvarianten: Ältere Schraubdichtungen an Aluminiumdeckeln waren oft einfache Gummiringe, die zwar lange hielten, aber bei ausreichender Flexibilität wiederverwendet werden konnten. Moderne Dichtungen für Verbundwerkstoffdeckel sind typischerweise mit einer Metallhülse verbunden, die die Schraube präzise positioniert und eine definierte Klemmhöhe bereitstellt – diese sind ausschließlich einmalig verwendbar, da die nach der Ersteinbauung eintretende Kriechverformung des Gummis nicht rückgängig gemacht werden kann. Auch Zündkerzenrohrdichtungen entwickelten sich vergleichbar weiter: Ältere Ausführungen bestanden aus einfachen O-Ringen, während moderne Varianten stufenförmige oder lippenförmige, spritzgegossene Teile sind, die sowohl am Rohr als auch an der Aussparung des Deckels ausgerichtet werden. Nachrüstbare Universal-Dichtungen treffen selten genau genug auf die Buchsen-Tiefe oder den Schraubendurchmesser, um die erforderliche Klemmkraft zu erzielen; daher sind modellspezifische Dichtungen der einzige zuverlässige Weg.
Die über 150 Ventildeckel-Modelle von Nansen Auto integrieren präzise Gummimanschetten-Sitze und Dichtungsnuten für Schläuche, die im Rahmen unseres IATF-16949-Kontrollplans sowohl mittels Vibrationsprüfungen (nach SAE-J1455-ähnlichen Profilen) als auch mittels Dichtheitsprüfungen (0,3 bar für 30 Sekunden ohne messbaren Leckstrom) getestet werden. Jeder Dichtungssatz, der aus unserem Werk in Si County versandt wird, ist speziell auf das jeweilige Ventildeckel-Modell abgestimmt – unabhängig davon, ob es sich um eine Honda-K-Serie, eine Toyota-1AZ, eine Ford-EcoBoost-, eine GM-Ecotec-, eine VW-EA888-Motorbaureihe oder eine der zahlreichen anderen Plattformen handelt, die wir in unseren über 80 Exportmärkten unterstützen.
Häufige Fehler: Wiederverwendung von Dichtungen „weil sie gut aussehen“ – eine visuelle Inspektion kann keine Kompressionsverformung erkennen; trockene Montage von Rohrdichtungen – die Dichtung reißt oder knickt oft während des Einbaus ohne Schmierung; Vermischen von Dichtungssätzen bei optisch ähnlichen Motoren – beispielsweise sehen Honda-K20- und K24-Deckel familienähnlich aus, weisen aber unterschiedliche Dichtungsgeometrien auf; sowie das Anziehen der Schrauben, bevor alle Gummibuchsen vollständig eingerastet sind, wodurch der Deckel kippt und die Rohrdichtungen in den Aussparungen falsch ausgerichtet werden.
FAQ:
FAQ: F: Was passiert, wenn Gummibuchsen wiederverwendet werden? A: Komprimierte Gummibuchsen ermöglichen eine Schraubenbewegung unter thermischem Wechsel, was zu einer ungleichmäßigen Klemmkraft, schrittweisem Lockern der Schrauben und vorzeitigem Versagen der Dichtung führt. Die daraus resultierende Ölaustrittsstelle zeigt sich meist 500–2.000 km nach der Wartung – lange genug, um zunächst nicht mit der Wartung in Verbindung gebracht zu werden, doch direkt durch die wiederverwendeten Gummibuchsen verursacht.
FAQ: F: Sind Nachrüstgürtel zwischen Motoren austauschbar? A: Nein. Jedes Design erfordert modellspezifische Schrauben, die an den Schraubendurchmesser, die Schraubenschienentiefe und die Steifheit des Abdeckungsmaterials angepasst sind. Universal-Klemmmaschinen liefern selten die richtige Klemmlast und produzieren oft chronische Lecks trotz des richtigen Drehmoments.
Fragestellungen: F: Woher weiß ich, ob meine Zündkerzen mit der Versiegelung versagt haben? A: Ziehen Sie eine Spule und untersuchen Sie den Brunnen mit einer Taschenlampe. Jedes gefüllte Öl, ein öliges Film oder ein geschwollener Stiefel zeigt auf eine Versiegelungsstörung hin. Selbst ein leichter Ölfilm ist ein Signal, alle Rohrdichtungen an dieser Bank zu ersetzen, da sie zusammen altern.
FAQ: F: Wie validiert Nansen Auto die Dichtleistung vor dem Versand? A: Jedes neue Deckelmodell mit integrierten Dichtstellen wird auf Luftdichtheit bei 0,3 bar getestet – ohne Druckabfall über 30 Sekunden –, anschließend bei Betriebstemperatur vibrationsgetestet und schließlich mittels Bildanalyse auf Hohlraumabmessungen geprüft. Dieses kombinierte Prüfverfahren ist Teil unseres IATF-16949-Kontrollplans und teilt das Konstruktionskonzept unseres Patentantrags für Ventildeckel – so halten wir niedrige Gewährleistungsquoten für Teile aufrecht, die in mehr als 80 Länder versandt werden.